This is your moment, you've decided to step up and make a job board for your local Drupal User Group. You spend some time thinking about everything you'll need, including the job listings themselves. You'll want to gather the standard info, like job title and job description, salary, experience, the works. When it comes to gathering company info, your instincts make you take a few extra moments to plan.
If you think about this from the perspective of the person posting 6 or 7 jobs, she would end up having to type (or at least copy and paste) the business' contact information each time. If you think about collecting 3 or 4 fields for each business, then that's about 20 extra form fields for the user to fill out. If she then decides to change the info, let's say she made a typo, she now must click through each edit screen 6 or 7 times. That amounts to hundreds of clicks and several hundred repeated keystrokes.
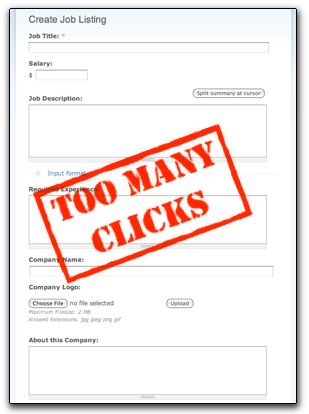
There must be a better way. A nodereference can help your users.
Once finished, you will have two nodes, one for a job and another for a company, and yet you will still display the information about the company inside the job listing.
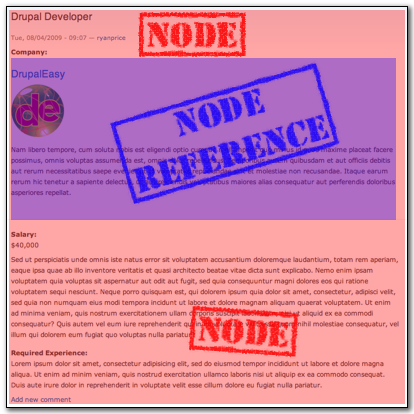
By the end of this tutorial, you should understand what a nodereference is for, how to create and use one, and finally, how to use template files to theme the output of the nodereference and get the most out of the relationship.
What's a Nodereference?
Nodereference comes bundled with the Content Construction Kit, or CCK. A nodereference lets you keep a collected set of reusable data inside a Drupal node, and then "reference" that node in interesting ways. In this case, a job posting will reference a company. Other examples could be a conference session referencing a meeting room, a house referencing a neighborhood, or a boy's profile referencing his mother (and she has a mother, so we can find out the grandmother too). Several contributed modules can use the relationship created by a CCK nodereference in interesting ways, as you will see later.
On top of saving your users' time, a nodereference will also help keep your data clean from a computer science perspective. In CS classes they talk an awful lot about database normalization: in brief, you don't want to keep multiple copies of the same piece of data around; normalization is good for users and computers. One way to introduce database normalization in a Drupal site is by using a nodereference.
Set up both content types first
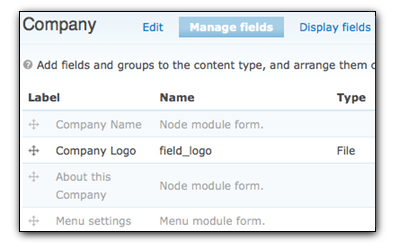
To get the Job/Company relationship set up, you will need to create both types from the Admin > Content > Content Types screen, starting with the company type. Name the new type Company, replace Title with Company Name, and replace Body with About this Company. Now click on Manage Fields next to the newly created Company type, and add a file field with an image widget for the company logo.
Next return to Admin > Content > Content Types and create the Job Listing type, replacing Title with Job Title, and Body with Job Description. Add an Integer field for the Salary and a text area for the Required Experience, now get ready to make a decision:
When adding a nodereference, you need to decide on the widget used during node creation. You can change your mind later, but normally each situation will call for a certain widget:
- Select list
- if you don't have too many nodes to choose from, this can be a great choice; the user can see all of her choices at once and make a decision on which node to reference;
- Check boxes/radio buttons
- if you need to refer to multiple nodes at once, checkboxes can help; and/or if the list of possibilities is even smaller than needed for a select list (5 to 9 at most), then radio buttons may be your choice;
- Autocomplete
- this widget works very similar to a freetagging taxonomy selector or the
Authored by:field at the bottom of a node form; you start typing, and Drupal will display a list of node titles that match the text you entered; you often only need to type a few letters to find exactly what you need, however, this requires the user to have some idea of what she is looking for; you also have the option to choose whether to search inside the node's titles, or only at the beginning;
In this case, the user entering a job listing will know the name of her company, so an Autocomplete widget should work just fine for you.

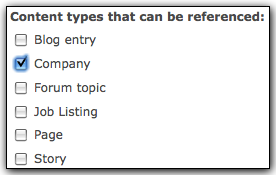
Another selection you need to make is the kind of node you want your field to reference. Since this field is just to draw a relationship between a job listing and company, choose the Company checkbox. Now when your user types in the autocomplete field, she will only see names of companies that match, not every node on the site.
At this point your job listing content type should have fields for Salary, Experience, and Company, all ready for input.
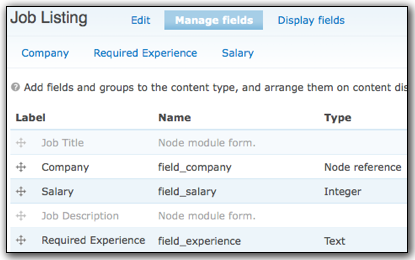
Now go ahead and add some test content — make sure you add at least one company before you add a job, to get the full effect. When you get to the Company autocomplete field, you should see one or more choices appear as you type.

And that's it! Your job listing now lists all the company info AND the job-specific information... oh, no it doesn't! All it shows is a link to the company node, that's no fun!
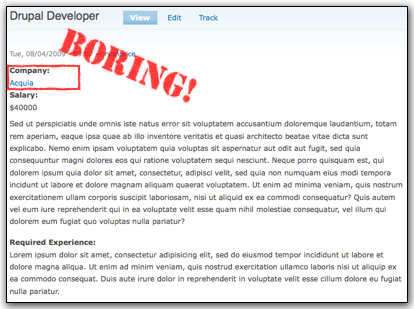
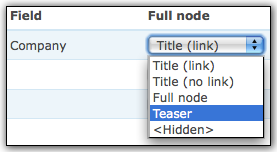
The very quickest way to solve this problem is by visiting Admin > Content > Content Types > Job Listing > Display Fields. Here you will see a list of all the fields added by CCK, with columns for Label, Teaser, and Full Node. Don't worry about the Exclude checkboxes, but also don't check them unless you know what you're doing.
Your goal here is to get the company logo and description to appear on the job listing page, so under Full Node for the Company field, choose Teaser.
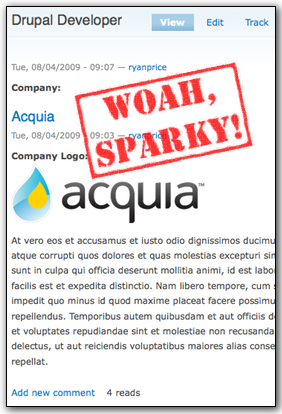
OK, so now you should be good to go, right? Go take a look at your Job listing node now... Ouch! There are now 2 "submitted" strings, and 2 sets of links that say Add a comment. Will it be back to the drawing board? No, it's just time to create a theme file.
Creating a Template File to Theme the Teaser
In Drupal you can apply a different template file in several different situations simply by using the proper file name. In this case, you want to change what is happening to Company nodes only when they are displayed as a teaser, like when the teaser is shown on the job listing. You can do a lot with the Display Fields, but you won't be able to get rid of the links for the company (Add a comment, 4 views) without a small bit of code. The key distinction here is that you may want the submitted string and the links on the full node, so in order to make a special case for the teaser, you need to create a template file.
In the file system, (that is, in FTP or on your hard drive) navigate to your theme's folder under the sites/all/themes directory. In the theme's folder, you should see a node.tpl.php file. Copy this file and name the copy node-company.tpl.php. How do you know what to name these files? There is a page on the Drupal Handbook about naming templates.
![node-[type].tpl.php node-[type].tpl.php](https://www.drupaleasy.com/sites/default/files/files/10_node_tpl_php.png)
If you're using a theme that has sub-themes, the process is almost identical. You simply may need to copy the
node.tpl.phpfrom another folder.
if ($page == 0):
When a node is displayed on its own page (like node/17), the value of $page
will be 1. When a node is displayed as a teaser, the value of $page will be 0. You
can now use this knowledge to change the behavior of Company nodes' teasers.
Locate the following conditional:
if ($submitted):
Now add some logic to check for teaser:
if ($submitted && ($page != 0)):
In this case you don't want the $submitted string to appear on teasers.
Apply the same logic for links:
if ($links):
After you add the extra logic:
if ($links && ($page != 0)):
Also, make a quick visit to Admin > Content > Content Types > Company > Display Fields and change the Label for Company Logo to . You may also want the logo to link back to the company node, so under Teaser, select Image linked to node if you like.
Now, take a look at the final product! See how it shines? You've saved your users time and wasted effort, normalized your database, and didn't make any compromises.
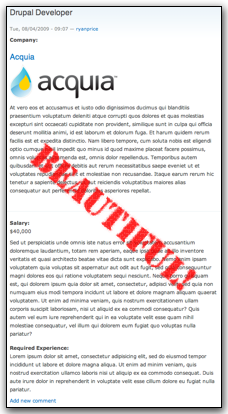
Now go and read Mike's article about Nodereference and Views to make some more amazing stuff.
Clearing the Theme Registry
If for some reason you don't see your changes to the template immediately, don't blame yourself. The theme registry may be at fault. As part of Drupal 6's caching an performance scheme (i.e. to keep the site fast and responsive), Drupal will not always scan for new template files and functions on every single page load. During theming, this can sometimes mean that changes do not appear immediately, so just make sure to clear the theme registry after adding a new theme function or template file. Please try one of the following before you bang your head against the keyboard:
- On the
Administer > Site configuration > Performancepage, click the "Clear cached data" button. - If you have Admin Menu module installed, under the icon in the top left, choose
Flush all caches > Theme registry. - With devel block enabled (comes with Devel module), click the "Empty cache" link.
- The API function drupal_rebuild_theme_registry.

Comments
Nice post, helped me
Nice post, helped me understand noderefs. Cheers!
great tutorial. thanks a lot
great tutorial. thanks a lot
Veru useful tutorial!. God
Veru useful tutorial!. God bless you for sharing your knowledge!