Over the past few months, I've been evaluating three Docker-based local development environments trying to figure out which is best not only for me, but also for students of our long-form Managing Professional Drupal Development Workflows with Pantheon (next semester starts February 17) and Drupal Career Online (March 26) classes.
I've been test driving Docksal (actually, I've been using it for over a year), DDEV Community, and Lando (I'm a recovering Kalabox user) trying to figure out where the "sweet spot" is for flexibility, ease of use, documentation, Windows-compatibility (we routinely have students on Windows machines), performance, and some other criteria.
I recently stumbled upon a cool open source project (thanks Brian!) called Mailhog that makes it dead easy to test outgoing emails from a local development environment. While I tested it on Lando, both Docksal and DDEV both support Mailhog and have supporting documentation here and here.
The general idea of Mailhog is that it acts as a local STMP server that by default, doesn't send emails to the addressed recipients. Rather, it includes a clean UI that allows the developer to view outgoing emails.
Getting Mailhog up-and-running in an existing Lando site is quite easy. Simply add the following to your .lando.yml
proxy:

  mailhog:

    - mail.lemp.lndo.site

services:

  mailhog:

    type: mailhog

    hogfrom:

      - appserver
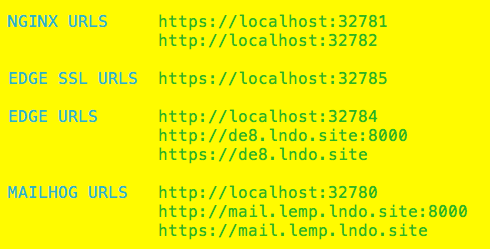
You'll probably want to change the URL of the Mailhog UI from "mail.lemp.lndo.site" to something specific to your project - in my case, I should have set it to "mail.de8.lndo.site".
Then, run "lando rebuild". Caution should be used when using this command, as while most services retain their data during a rebuild, some may not. So far, I can confirm that my databases come through just fine.
After rebuilding, you're just about done. When you run "lando start" the next time, you'll see a new set of URLs for the local Mailhog UI (you can also get this information via "lando info").
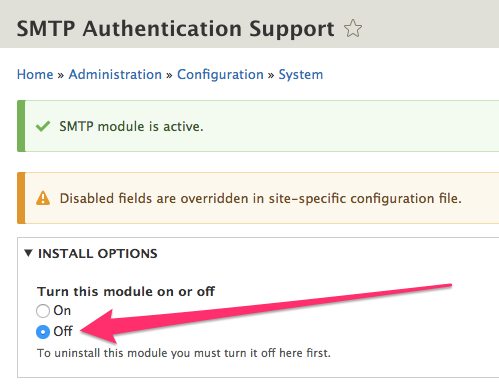
On your local Drupal site, if you're using the SMTP module or another SMTP-based sending solution, be sure to disable it:
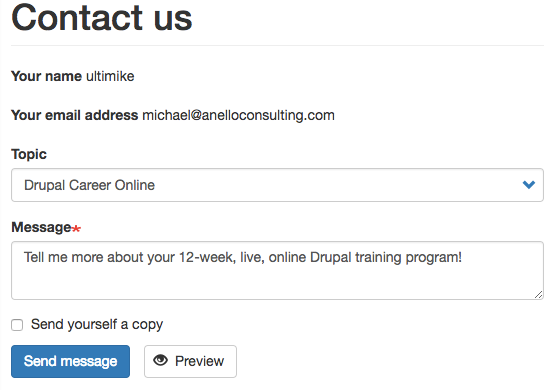
Then, sending an email from a local contact form (screenshot shows a local copy of DrupalEasy.com):
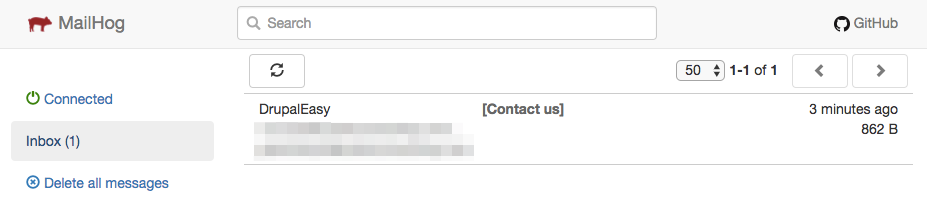
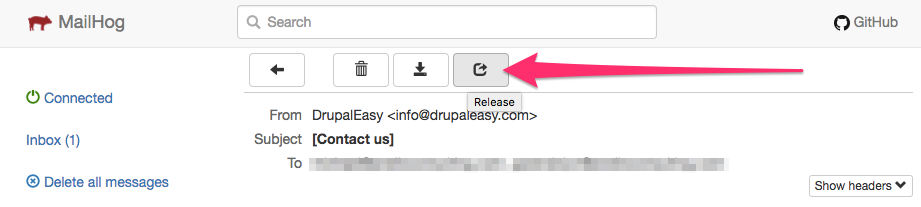
Results in this in the Mailhog UI:
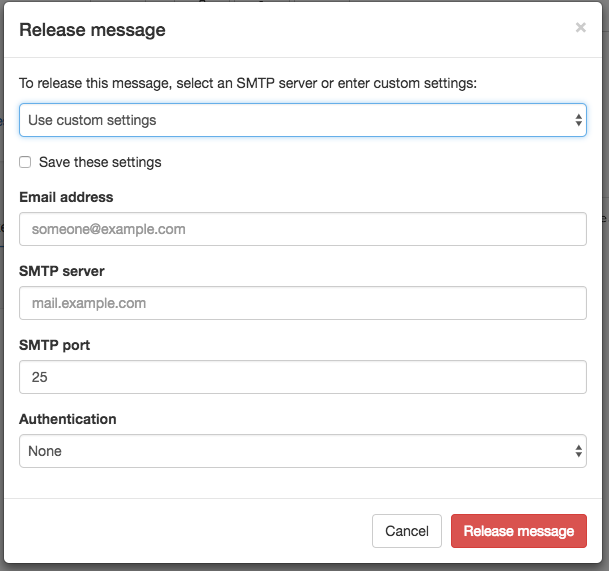
Then, if you want to "release" a message to its intended recipient, Mailhog provides you the option to do that as well via a button when viewing an email:
The button leads to an SMTP settings form:
Summarizing, regardless of if you're using Lando, Docksal, DDEV, or another local development stack, Mailhog is a great tool to help you test sending emails from your local development environments.
While the screenshots in the blog post demonstrate setting up Mailhog with Lando, I can confirm that the process is just as easy with Docksal using the documentation, as I was able to configure it for a local client site in about 5 minutes.
For more information about using Mailhog with Lando, see the official documentation page.
Comments
Nice article, thanks. Worth…
Nice article, thanks. Worth mentioning that 'mail.lemp.lndo.site' needs to reflect your site name which won't be 'lemp'.
Good point - I've added a…
So glad I came across this…
So glad I came across this article. Setup was so easy and I've saved SO MUCH TIME testing out custom emails being sent from my D8 site. Thanks for putting these steps together.
Nice. I ended up setting up…
Nice. I ended up setting up some automated Behat tests using Mailhog and defining a $mailpath in FeatureContext.php so that I can check mail and make sure that they are formatted and appear correctly
  /**

   * The path where mail can be rerieved

   *

   * $mailpath string

   *

   */

  protected $mailpath = 'http://mailhog';
/**
* @Given /^I check email$/
*/
public function iCheckEmail()
{
$mail_path = $this->mailpath;
$this->visitPath($mail_path);
}
This allows me to do:
    When I fill in "Email address" with "[email protected]"

    And I fill in "Password" with "0000000000"

    And I press "Log in"

    Then I should see the text "Unrecognized username or password. Forgot your password?"

    When I follow "Forgot your password"

    Then I should not see the text "404"

    And I should see the text "Password reset instructions will be sent to your registered email address."

    And I press "Submit"

    Then I check email

    And I should see "Replacement login information for Test Account at Mysite"

    And I should see "[email protected]"

    And I should see "Mysite"

    Then I click on the text "Replacement login information for Test Account at Mysite"

    Then I should see the text "A temporary password has been created for you. You may now log in by clicking this link or copying and pasting it into your browser"